Blender
cross-posted from: https://sopuli.xyz/post/18243654 > Up until I saw the person I couldn't even tell this was 3d which is saying something because the vast majority of 3d trying to emulate 2d I have seen has a weird plastic look to them.

This is a simple shader node group that breaks up the visual repetition of tiled textures. It uses a Voronoi texture's cell colors to apply a random translation and/or rotation to an image texture's vector input to produce an irregular pattern. I primarily made it for landscape materials. The cells' borders are still sharp, so certain materials, like bricks, wood, or fabric, will not look good.


I recently came across a [Japanese animation](https://youtu.be/hn7sJuuCM44) and love the way it looks and want to replicate the shader style and animation style
Recently I've been planning on designing some optics, nothing fancy just for a projector system that I'm messing around with. Anyway I got this idea that I could basically model the optics in blender using lux core to simulate the light path as it bounces the mirrors and passes through the lenses. So I am able to create lenses and parts of any kind O can think of but I would love to be able to control the parts after I've created them via parameters like radius of curvature for example for a mirror. Is that possible using a python script? Like somehow keep the script that created the geometry somehow linked to the geometry in such a way that I can come back to the script and change it later or maybe even change it using the timeline and key frames?

Hi So, the thing I want to accomplish is to add .png images, compile them and then transform the compiled montrosity (move/scale, etc). But the thing is, if I “alphaover” the images with some offset, for example:   the image laid over the other cuts off, as the overlay can’t reach outside the dimensions of the underlaying one. I know I can just: - use eg. gimp and combine the images there, but I’d rather have my workflow entirely in blender. - add transparent padding for ~billion pixels around the decal as a workaround, but that sounds silly and “bruteforcing” the concept. How would I go about getting all overlaid images to display in full in such case? I’ve tried different options on the “alpha over” and “color mix” -nodes without results, but entirely possible that I just missed some critical combination. So, thoughts?

This is a remake of one of my first nature scenes; it's always so satisfying to look back and see how far I've come since then. All made in Blender, rendered with Cycles. Let me know what you think!

cross-posted from: https://sh.itjust.works/post/24674915 > Sourced from [this article](https://zgodzinski.com/blender-prehistory/) about Blender's history, which interviews Ton Roosendaal, the creator.
I personally find this addon quite innovative. To me it looks like a 2d drawing toolset inside of 3d program that is more powerful and has unique 2d drawing features absent in actual state-of-art 2d drawing programs like CSP and Krita!

(also; an album: https://imgur.com/a/H4EZCdV - changed the topic link to show the render, for obvious visibility. Album includes node-setups for geonodes and the gist of what I use for most materials) Hi all, I'm an on/off blender hobbyist, started this "project" as a friend of mine baited me a bit to this, so I went with it. The idea is to make a "music video" of sorts. Gloomy music, camera fly/walkhrough of a spoopy house, all that cheesy stuff. It started basically with the geonodes (as shown in the imgur album) - basically it's a simple thing that generates walls/floorlists around a floor-mesh and applies given materials to them, nothing fancy but it allows me to quickly prototype the building layout. The scene uses some assets from blendswap: - https://blendswap.com/blend/14139 - furniture, redid the materials as they were way too bright for the direction I intended to go. But the modeling on the furniture is top notch, if a bit lowpoly but nothing a subsurf mod. can't fix. - https://blendswap.com/blend/25115 - the dinner on the table. Also tweaked the material quite a bit, the initial one was way too shiny and lacked SSS. Thanks to the authors of these blendswaps <3 edit: the images on paintings on the wall are some spooky paintings I found on google image search, but damn it I can't recall the search term to give props. I'm a failure. The source for the wall/floor textures are lost to time, I've had these like a decade on my stash. Wish I could make these on my own :/
Good morning, Hope this is not a stupid question, I am very new to Blender. So, my setup is: - 3d env built from iPad photogrammetry - we insert some lasers (a simple cylinder with emission node) - we control the lasers using QLC+ --> artnet --> BlenderDMX and a python expression that modulates the emission color for every laser from a separate dmx channel. We would now love to be able to store the dmx animation directly in blender as keyframes in order to export the animation and put it back on the iPad for AR simulation. Is there any way to record the driver data in real time?

My wife just finished playground asset pack for our life simulation game :) Here are the renders in Blender: 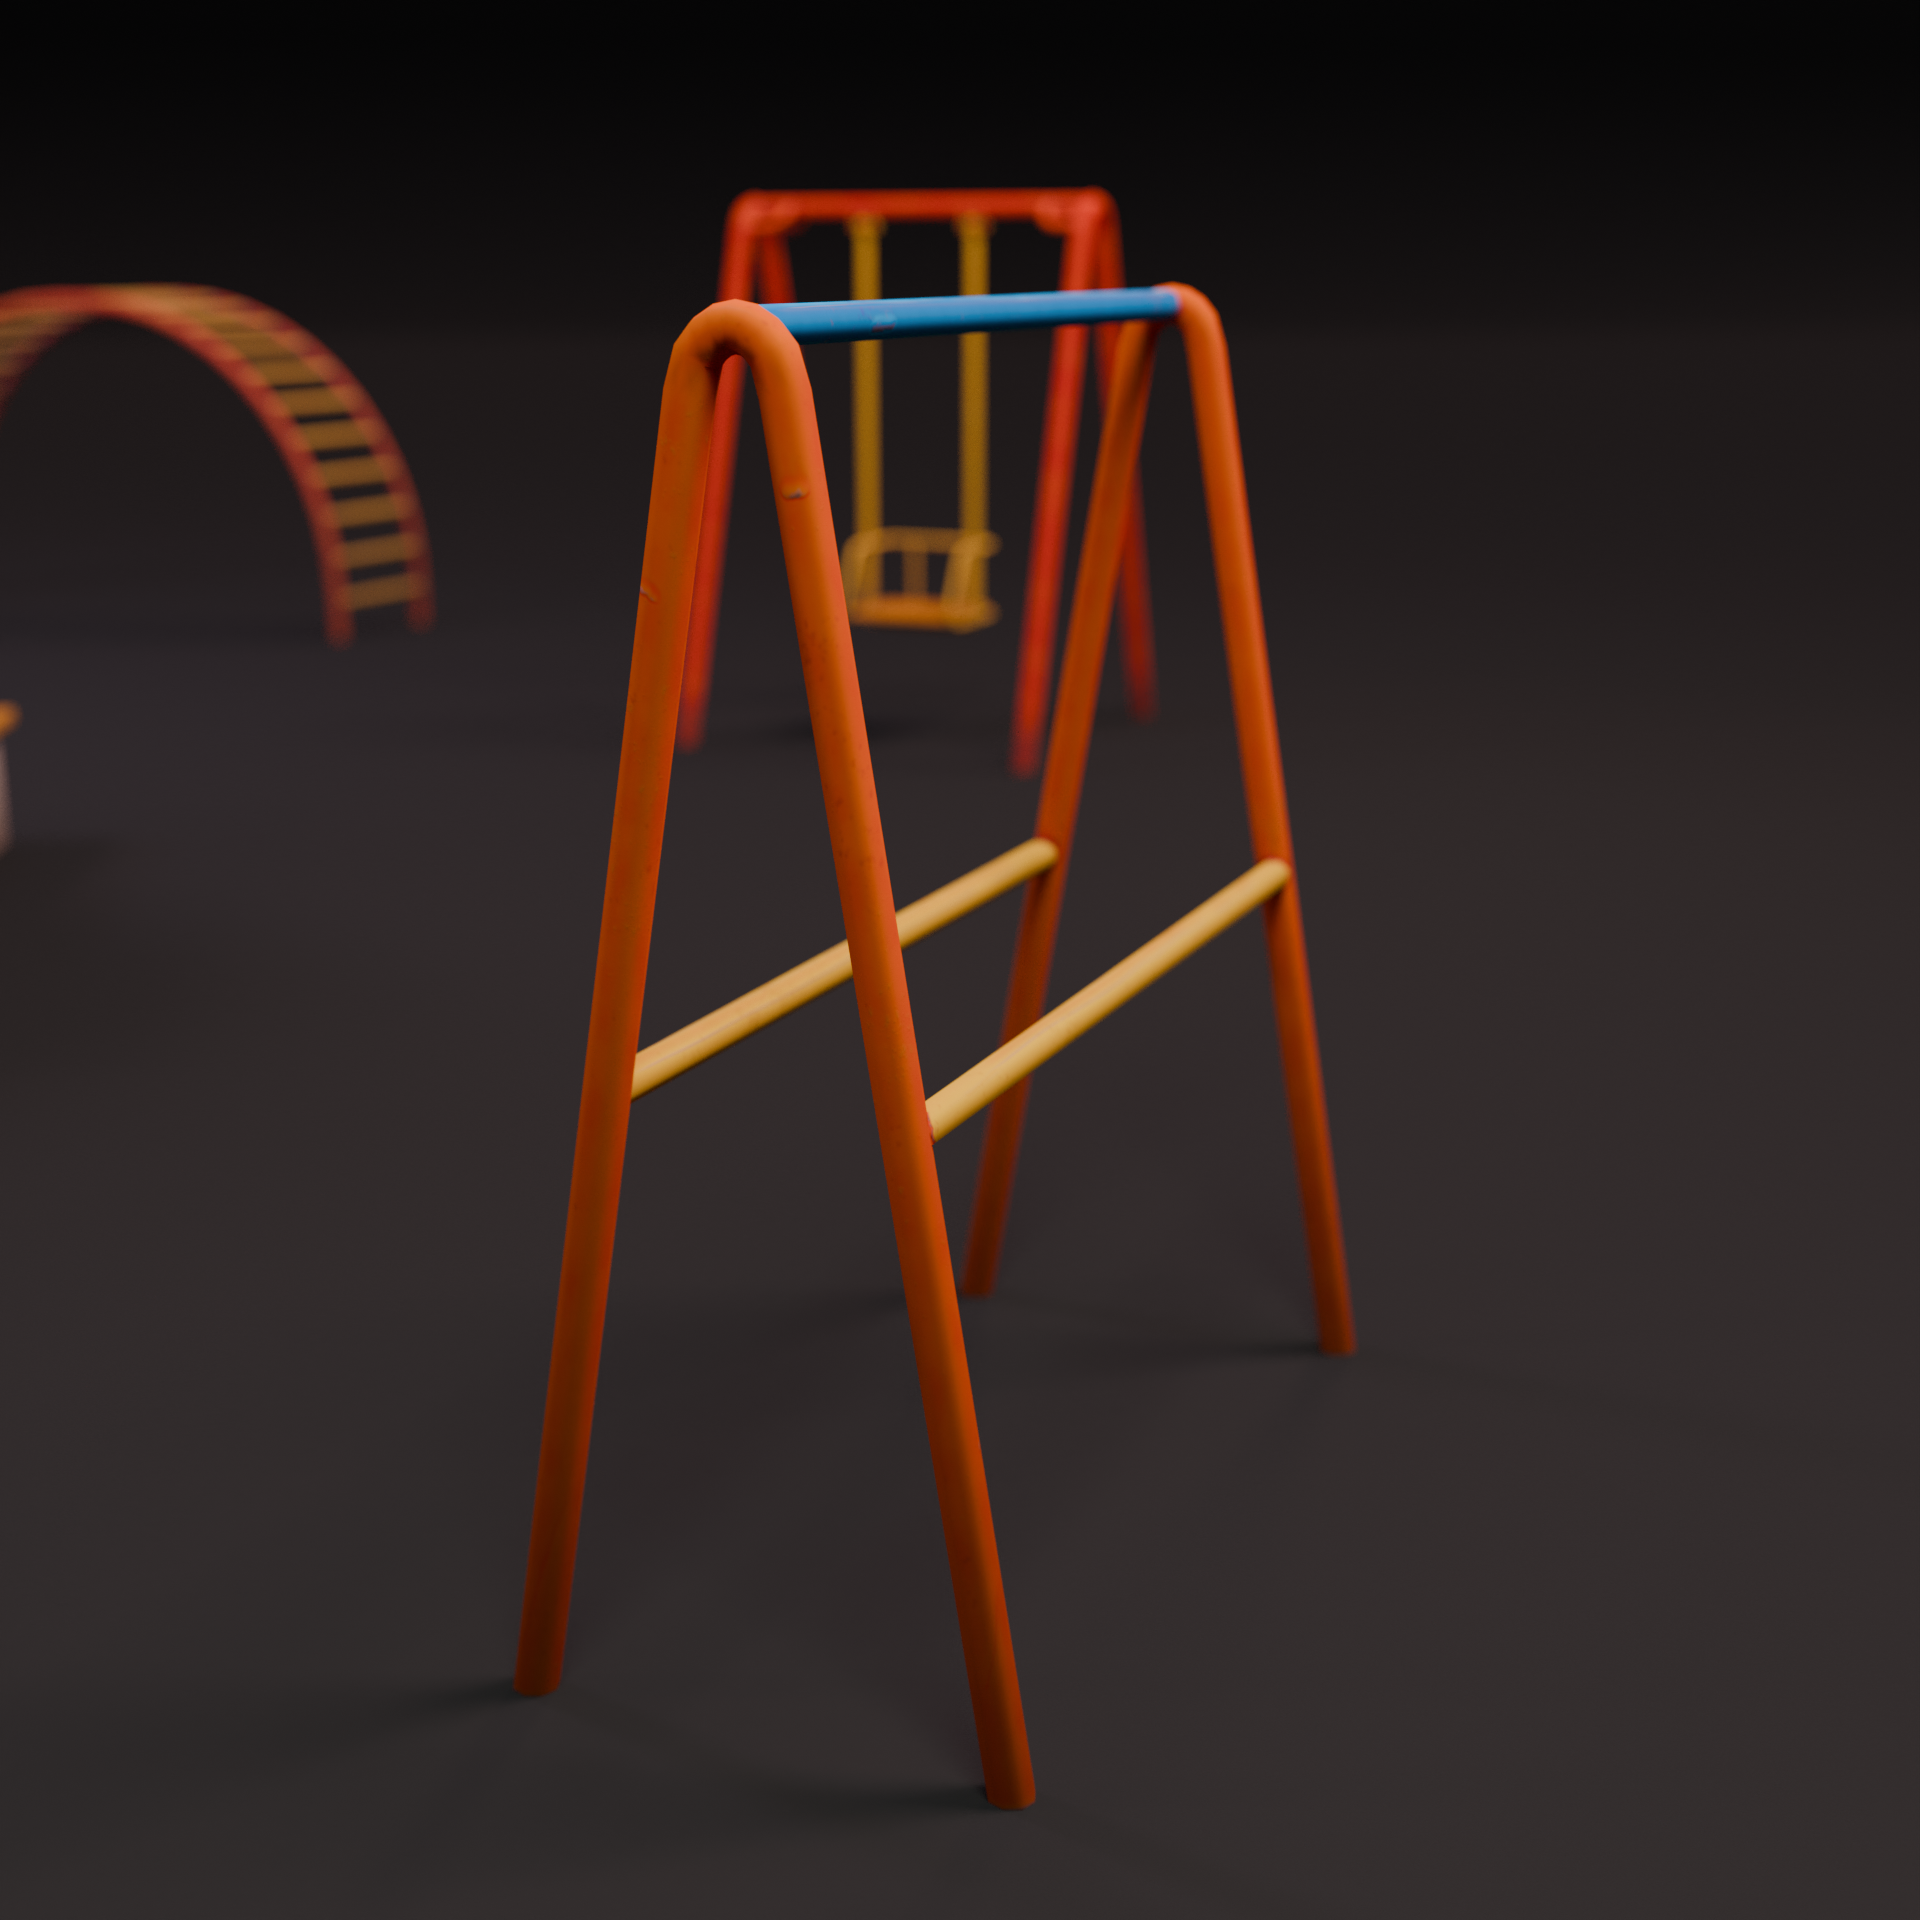 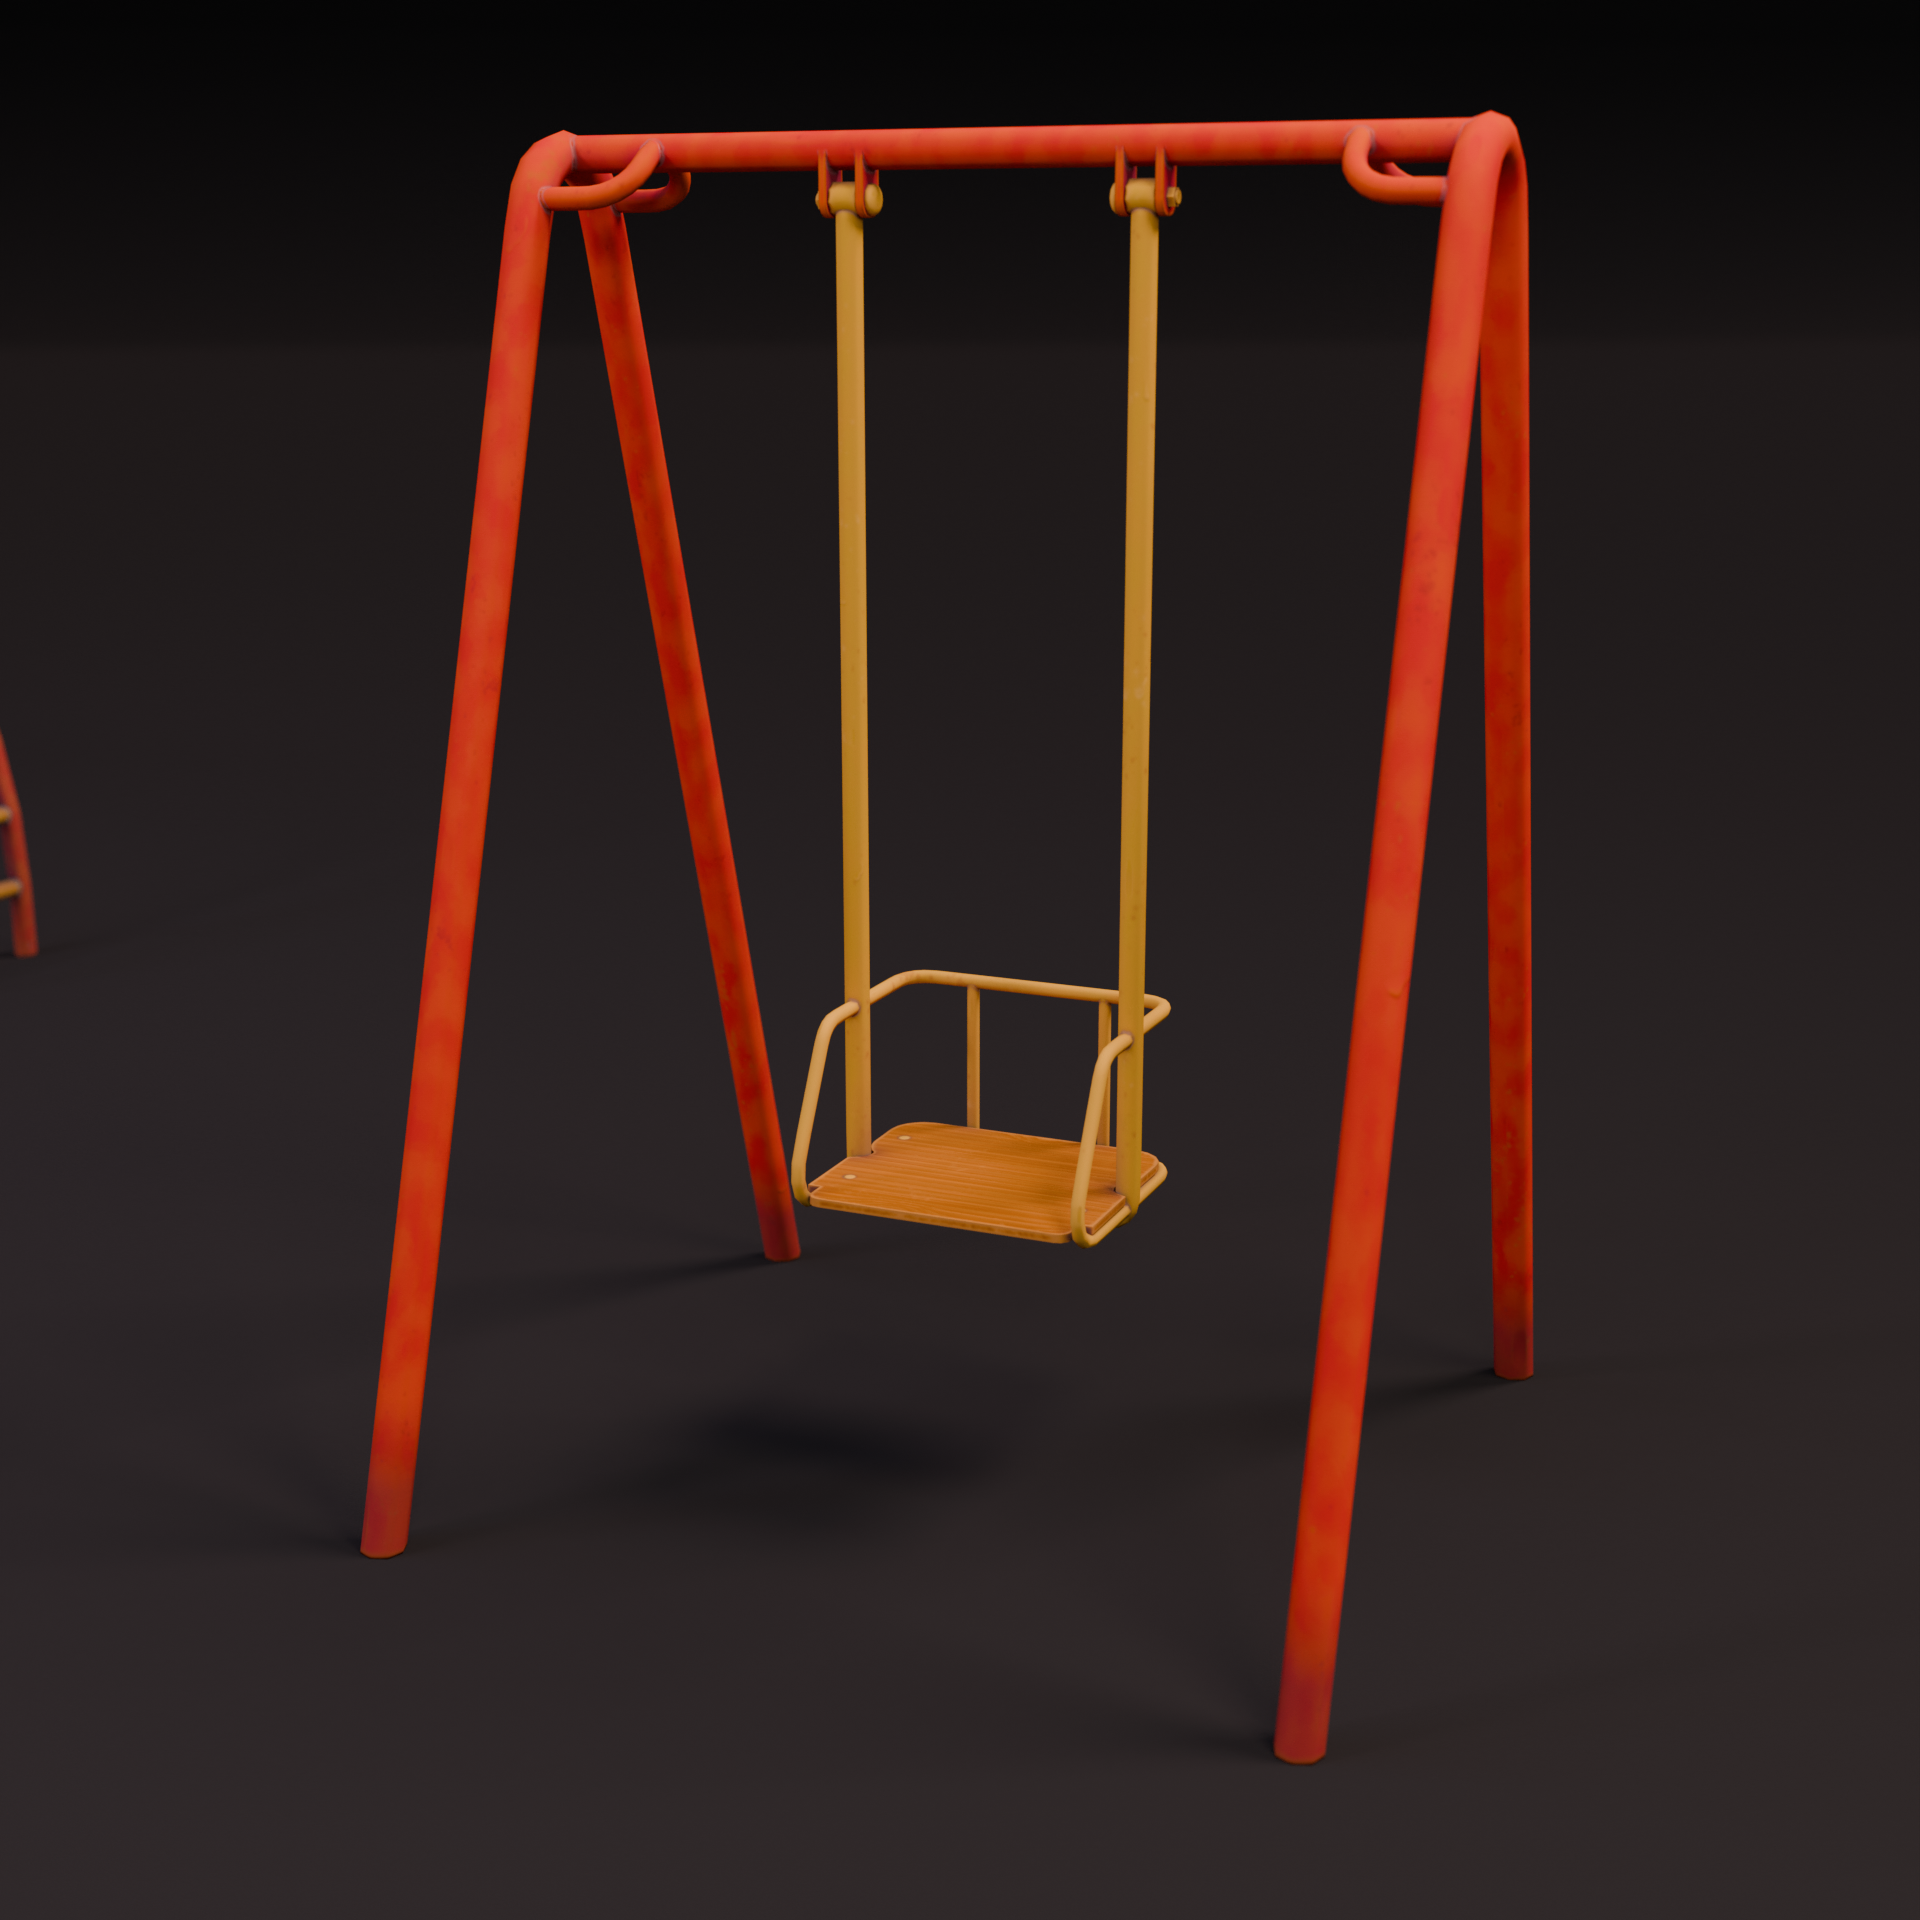   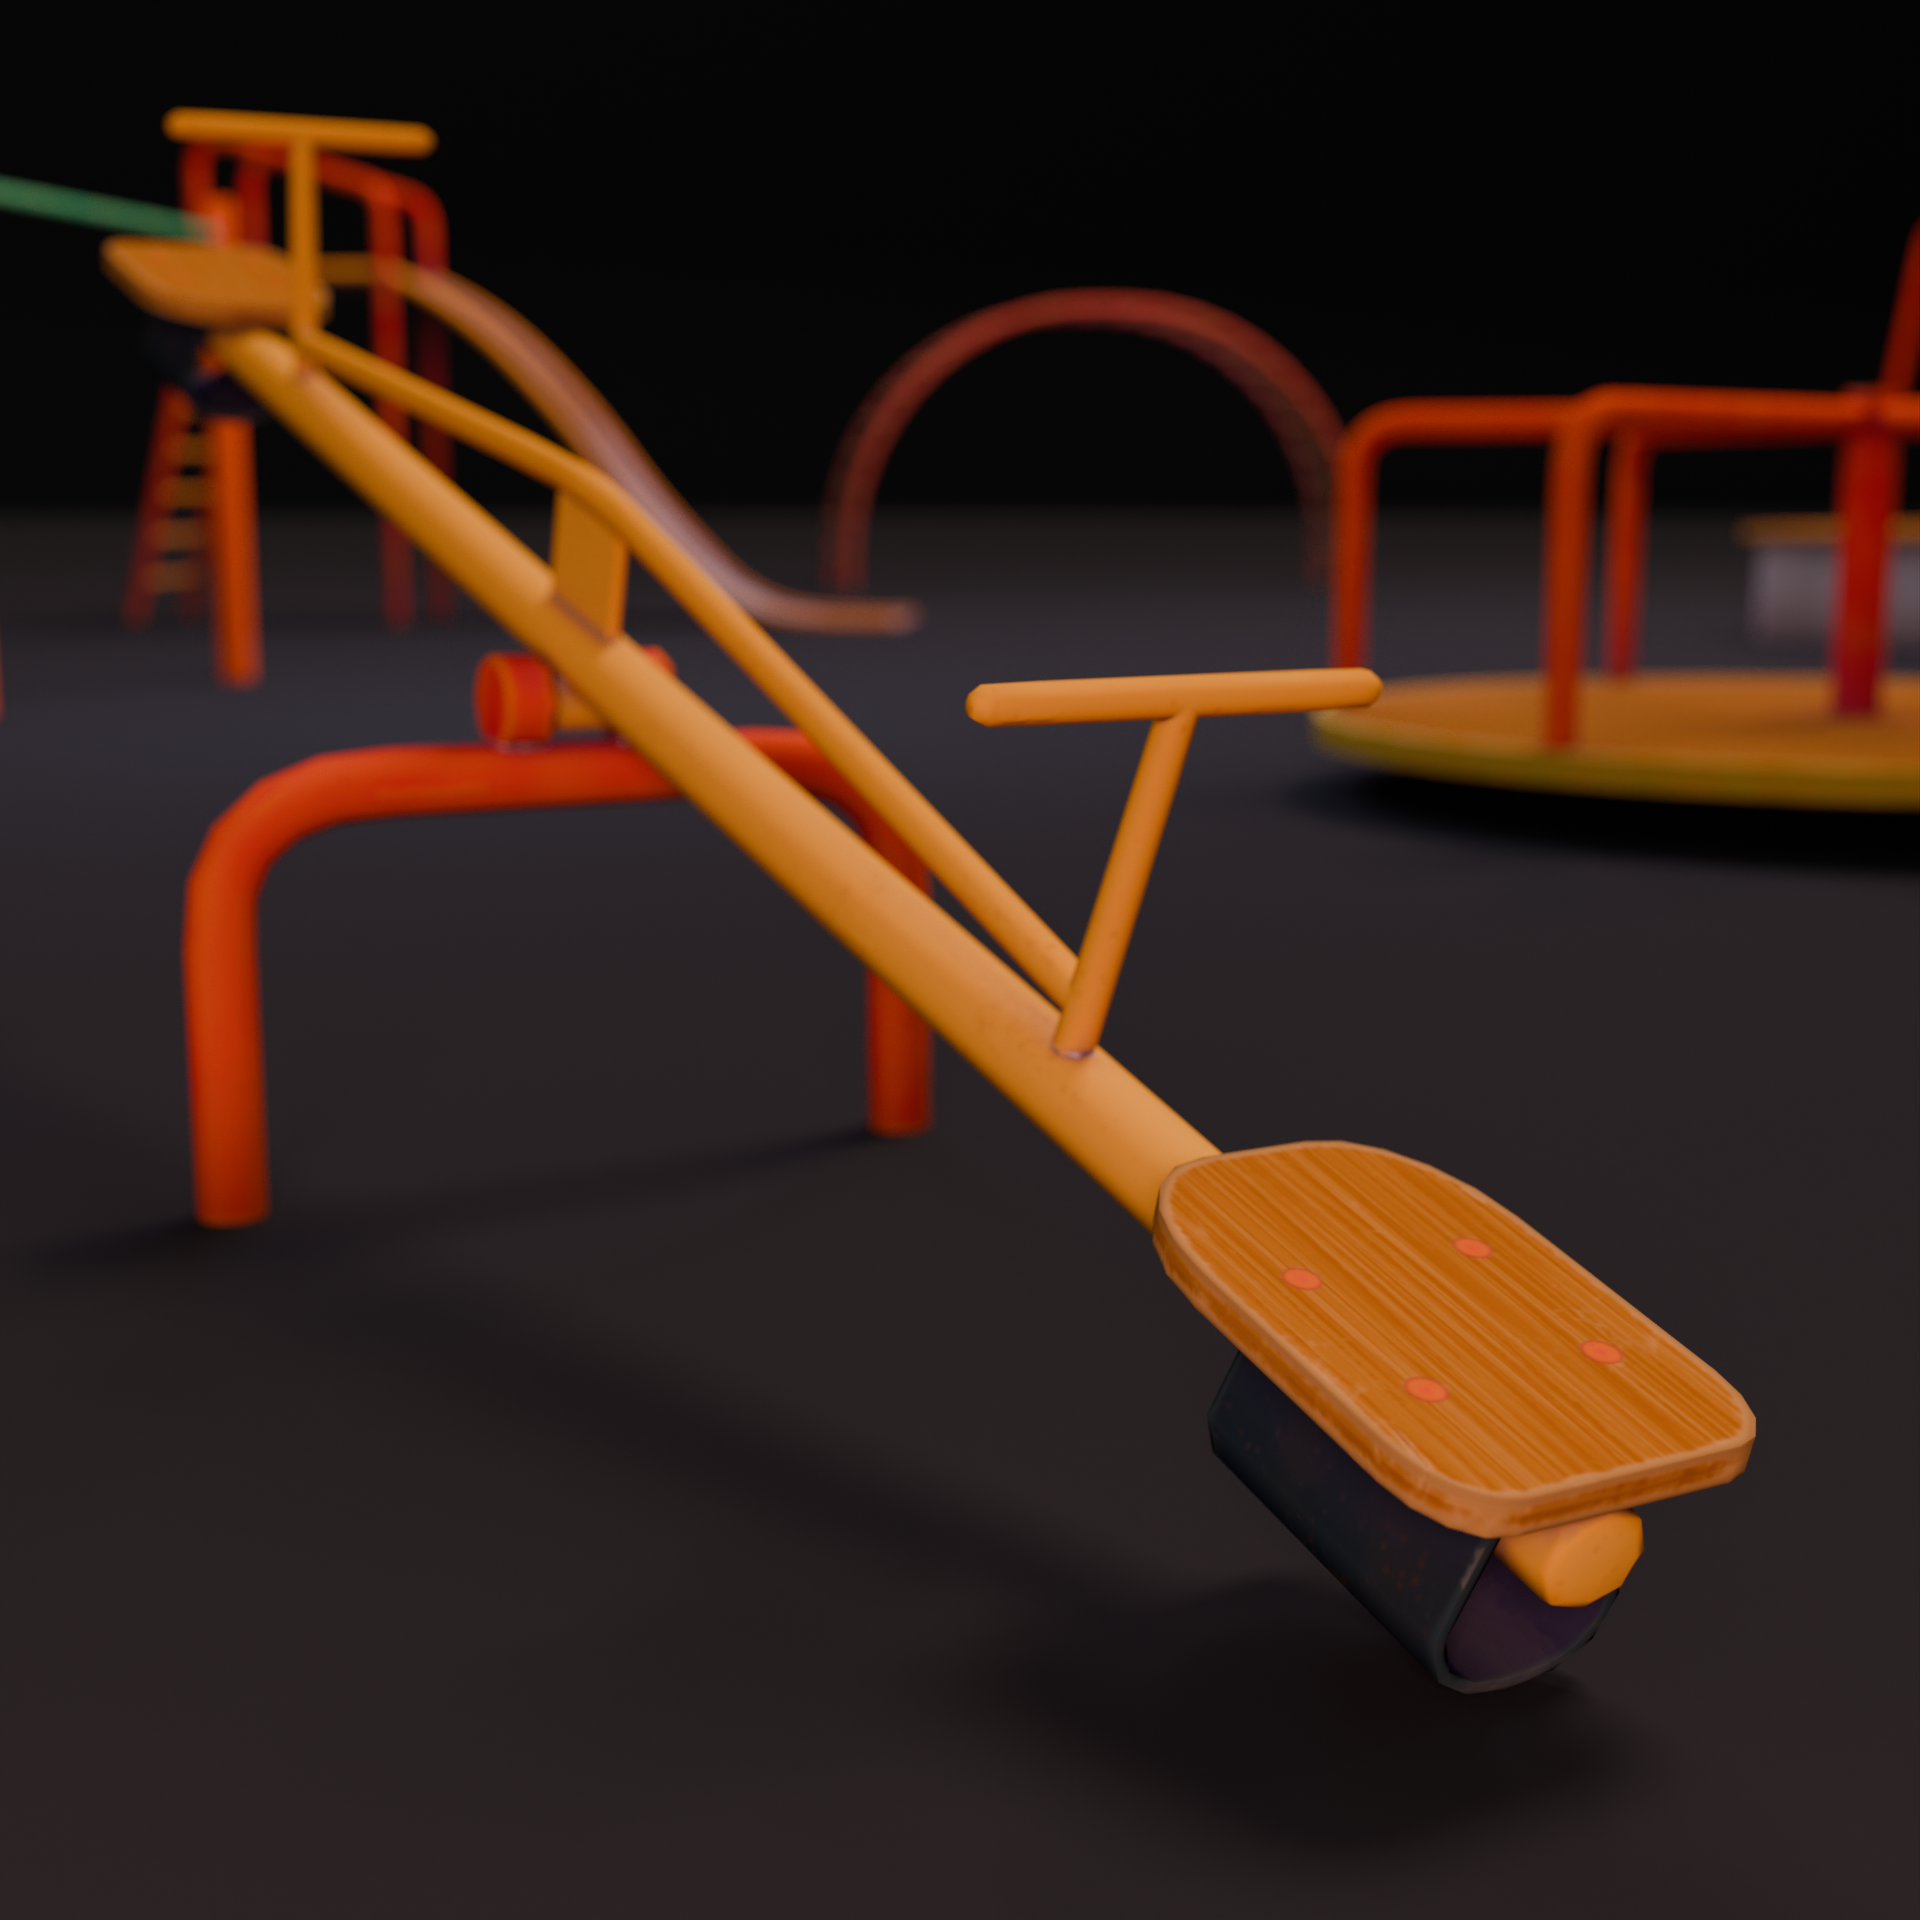 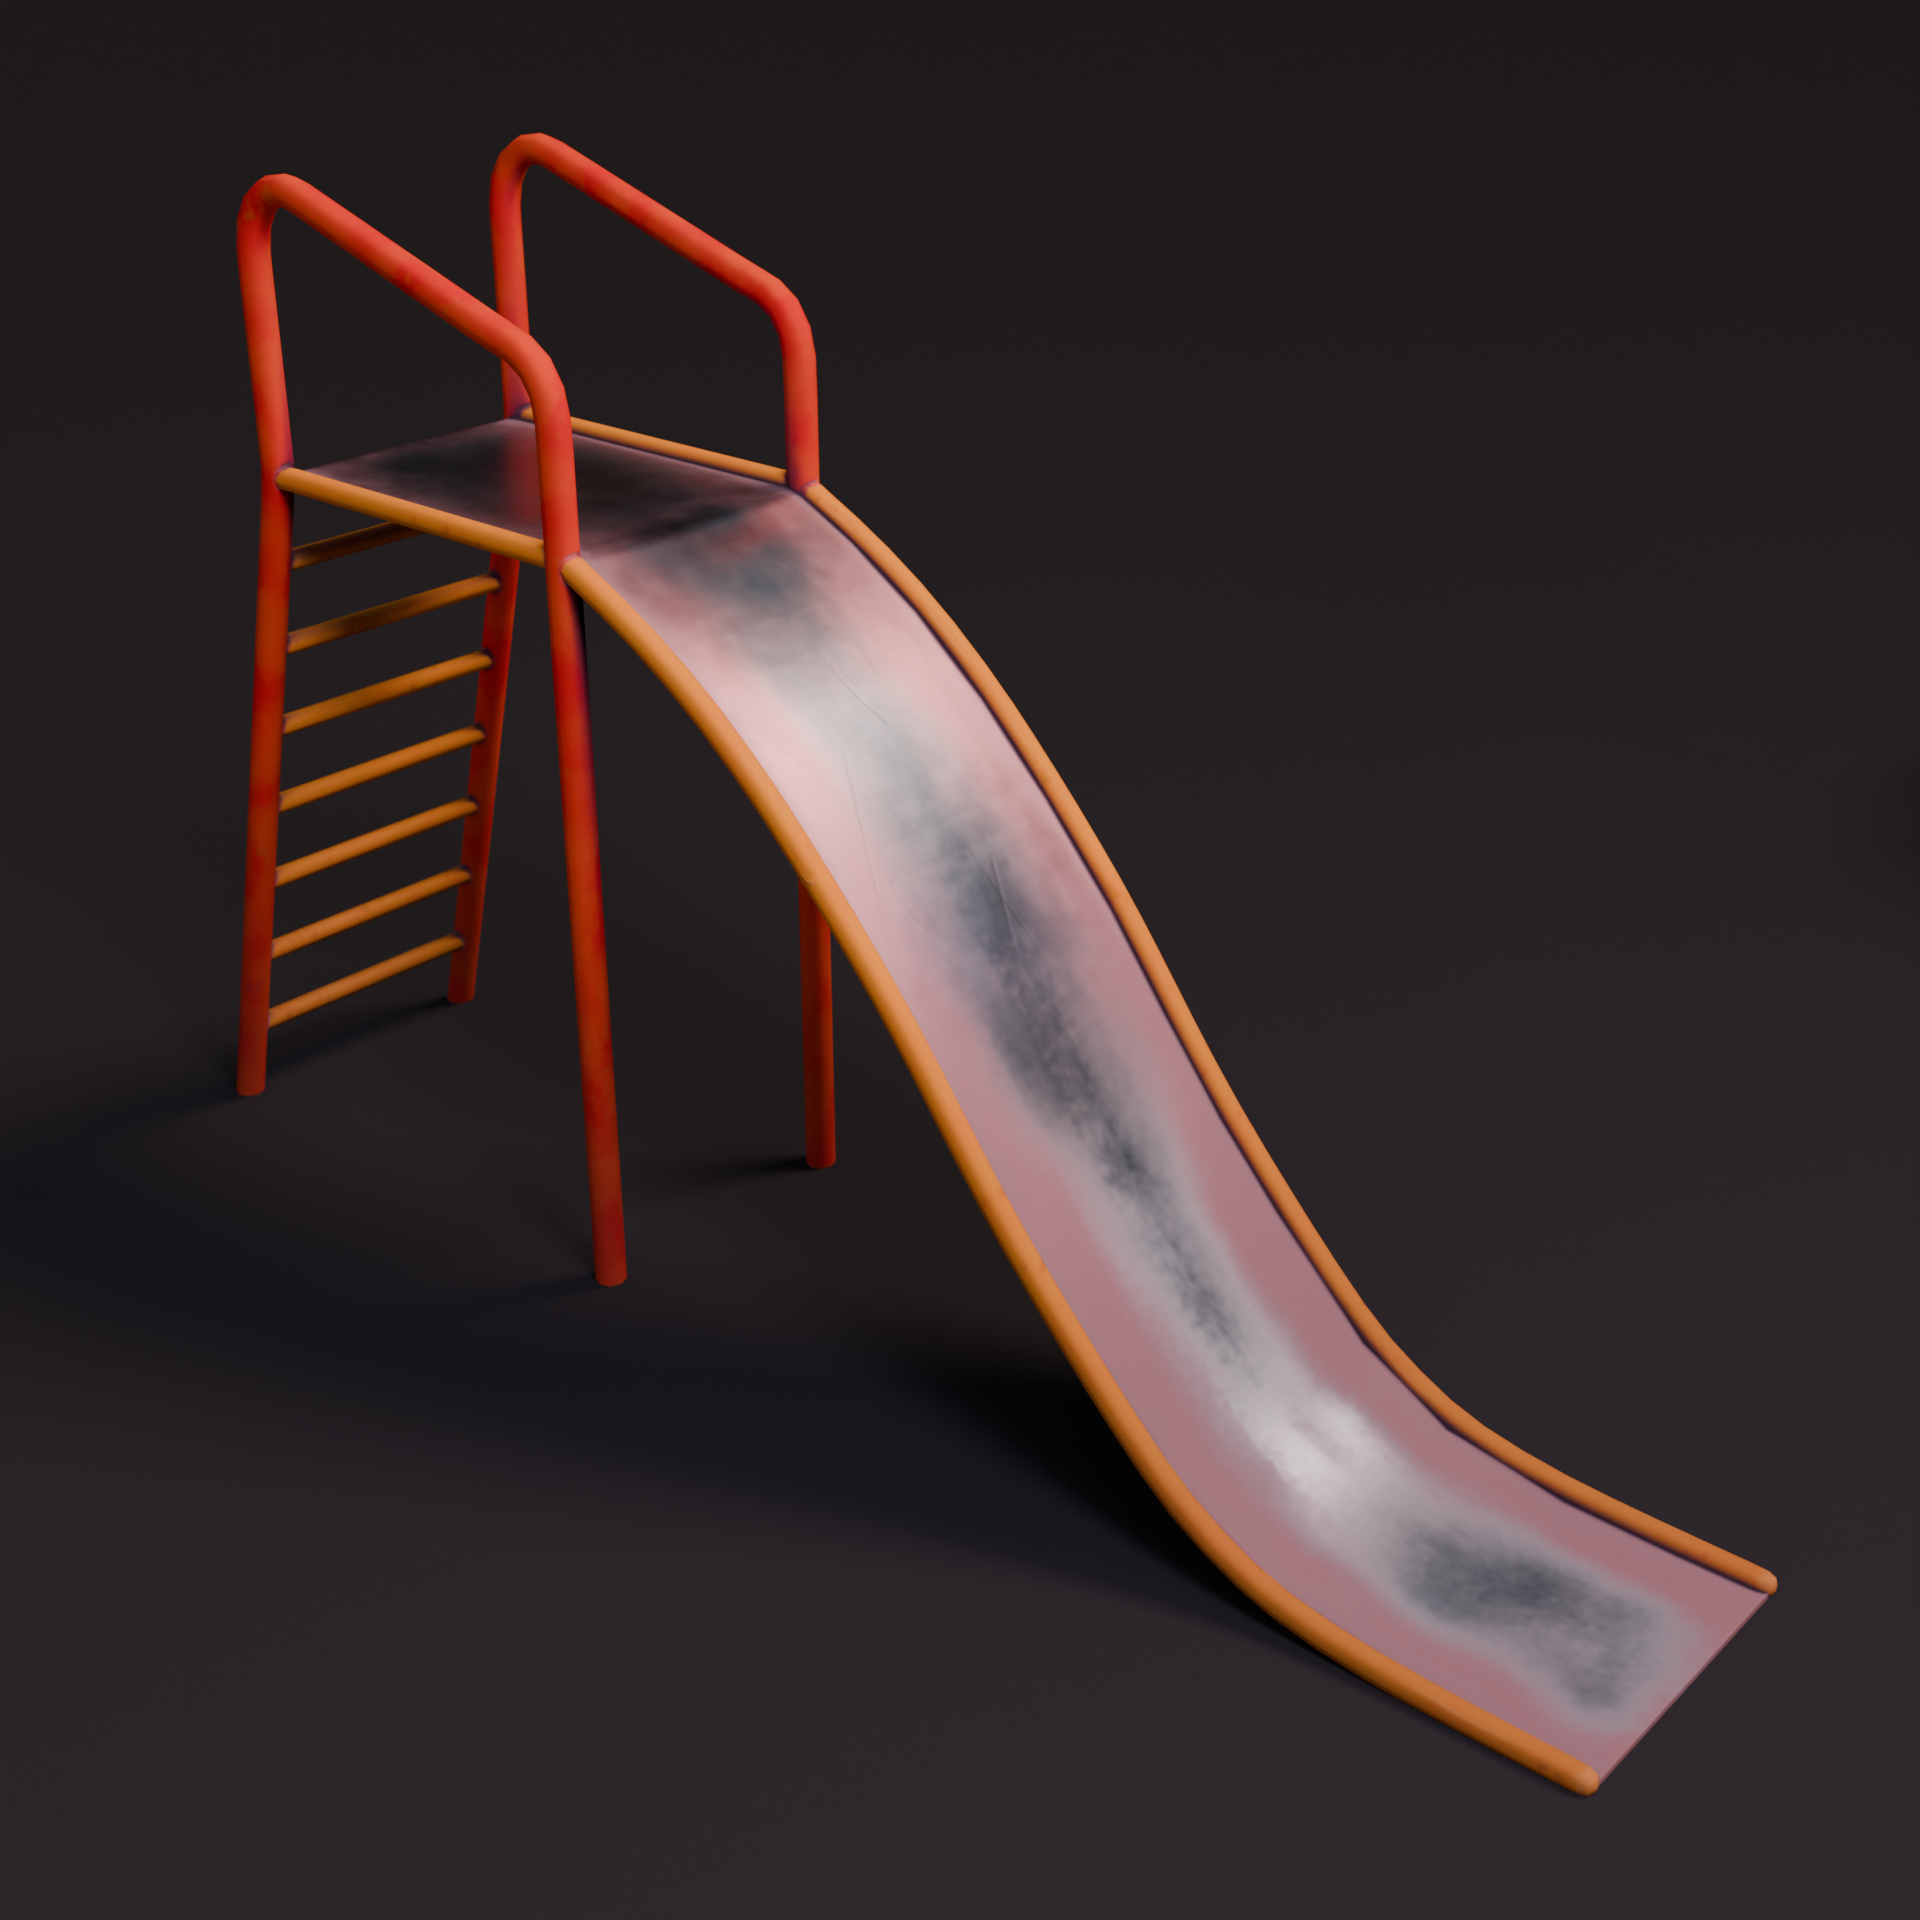 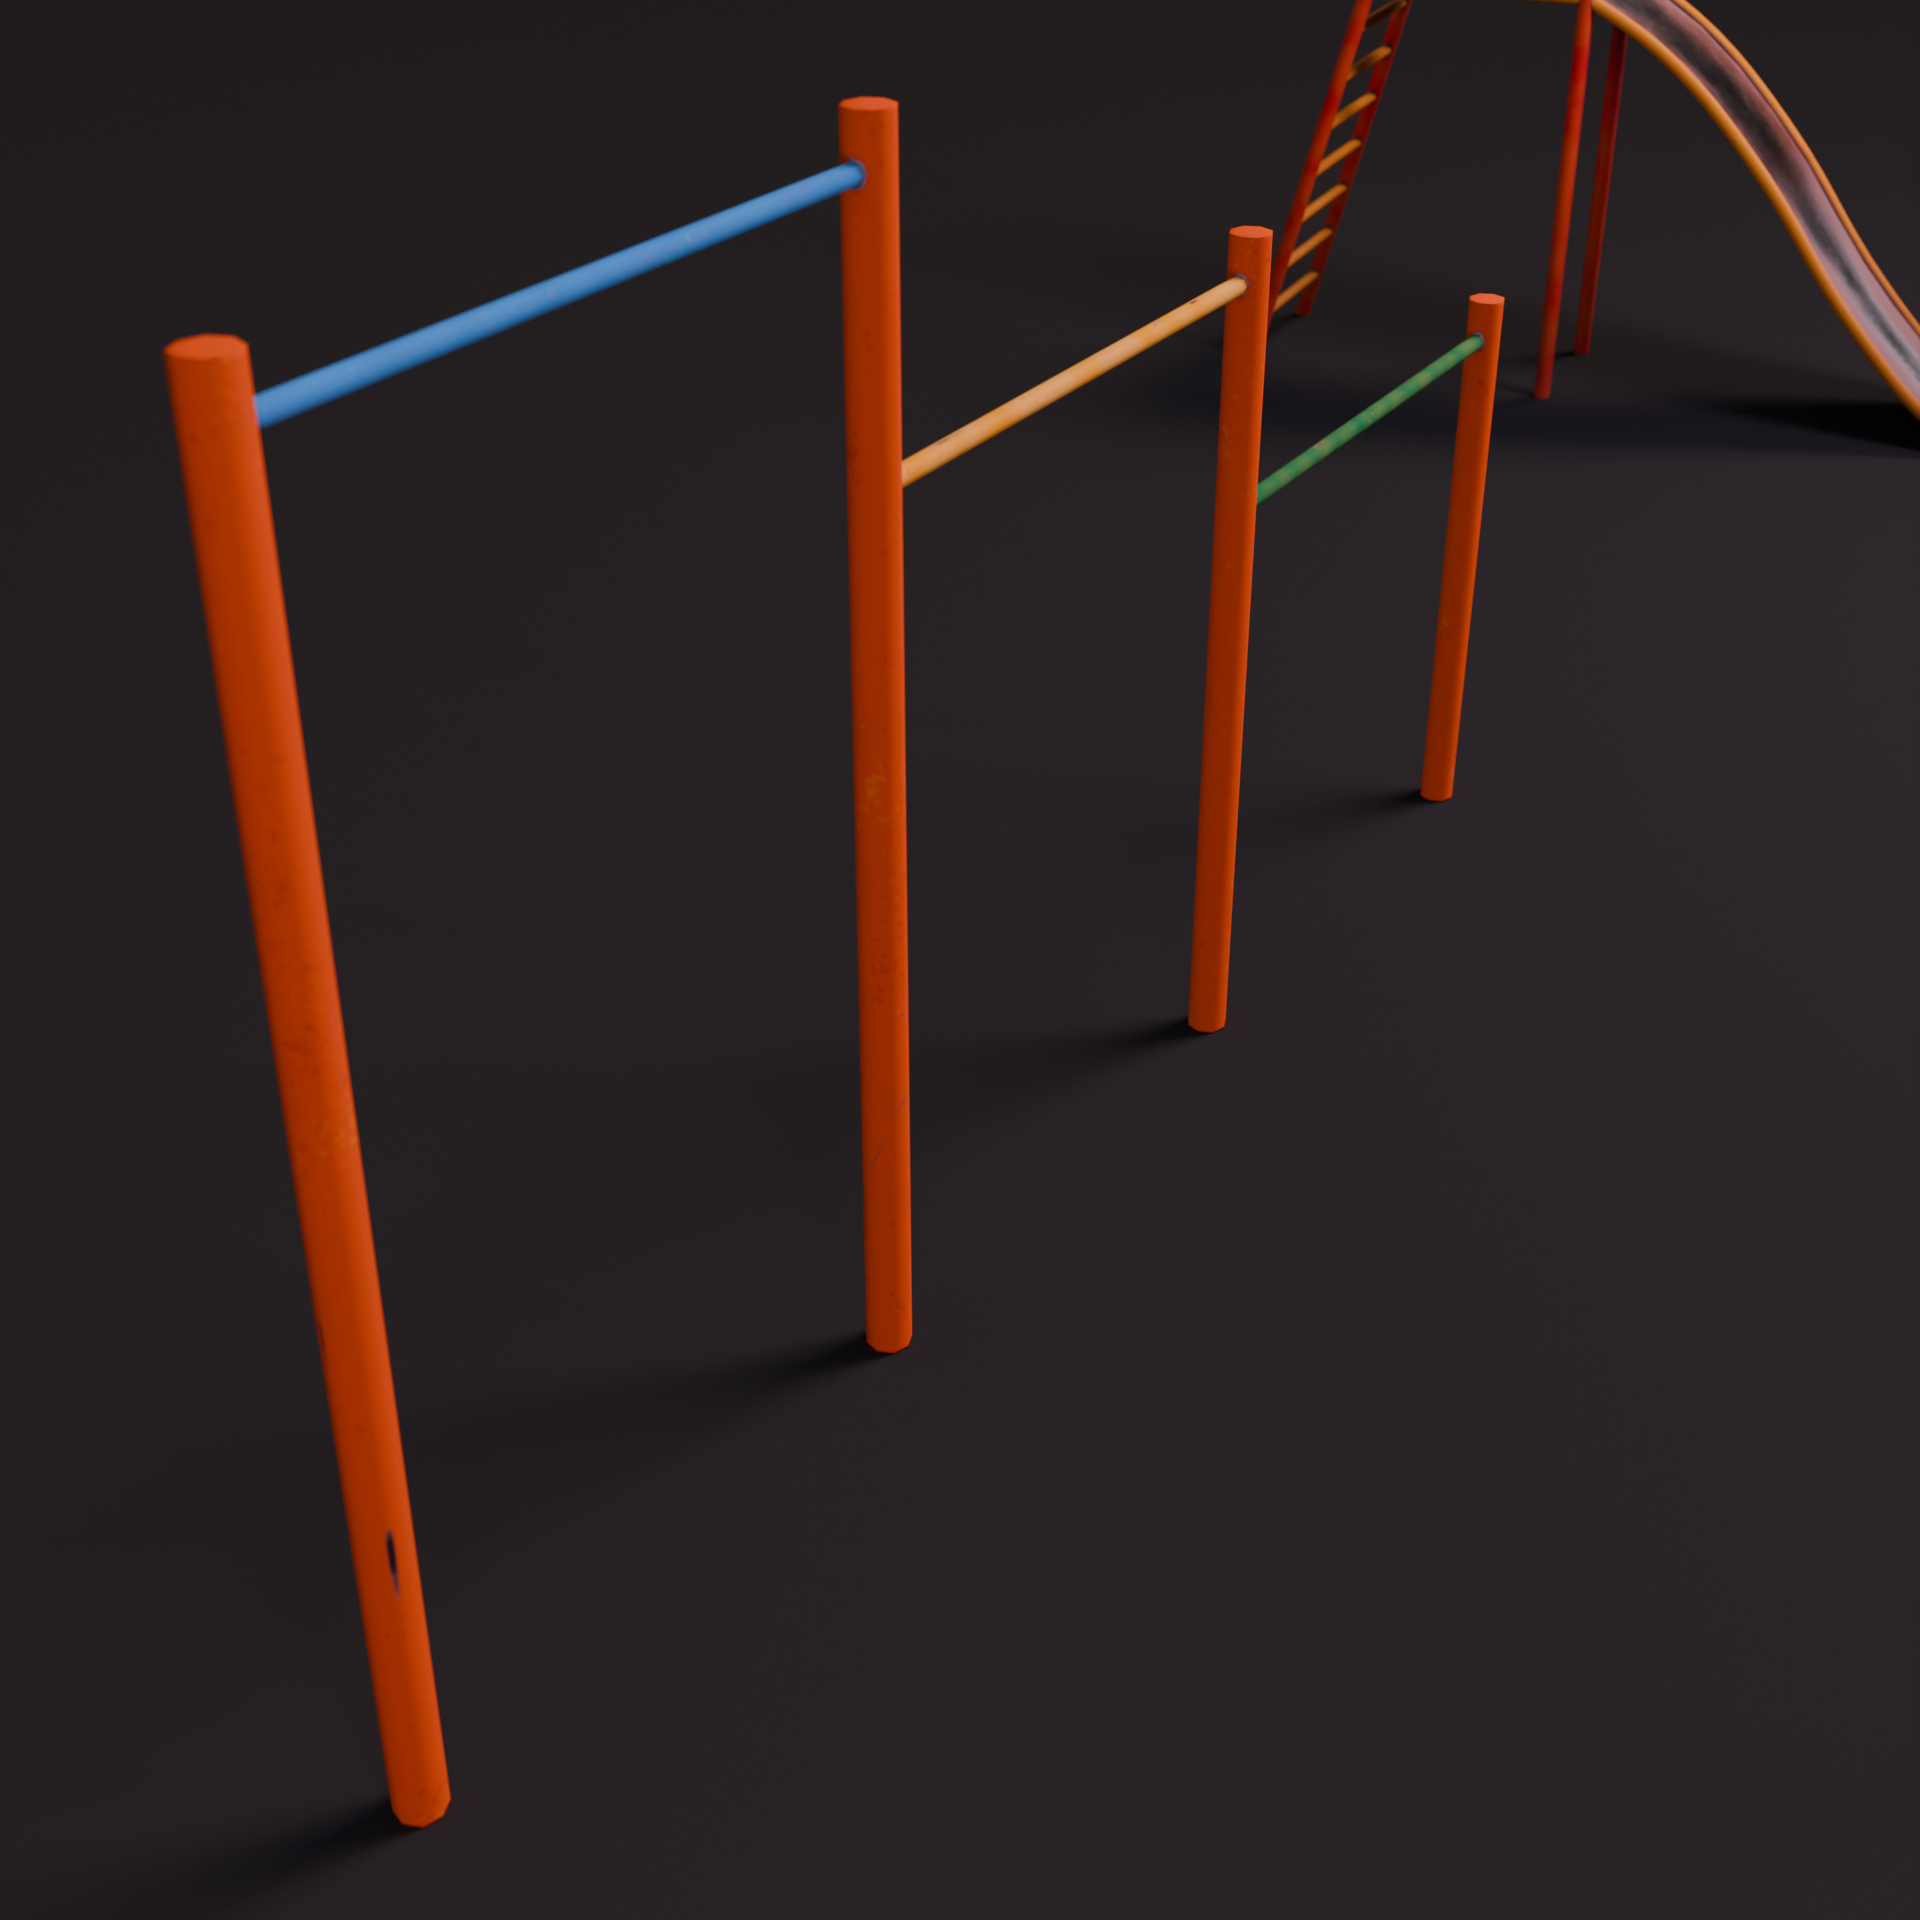
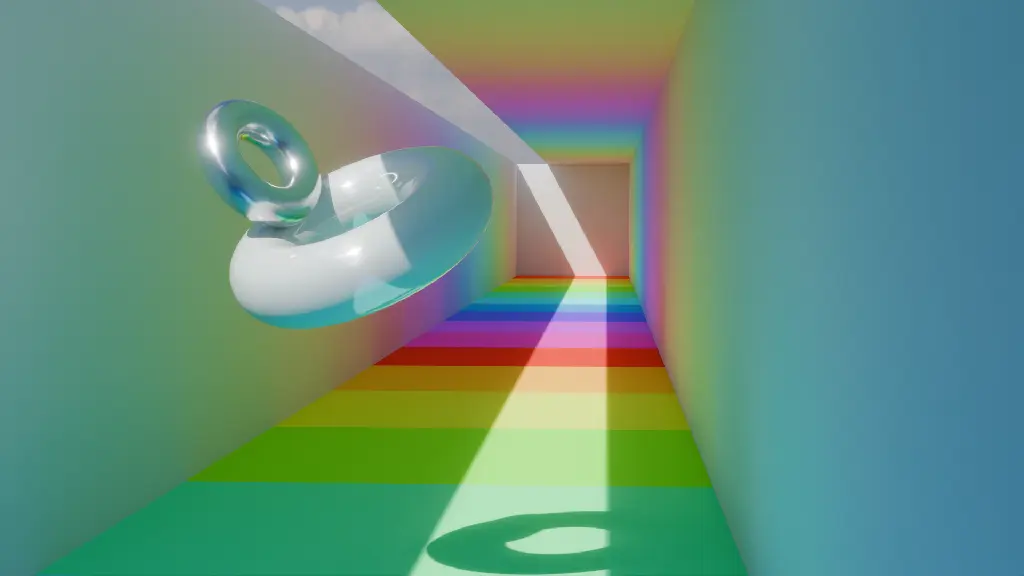
I've often seen this sort of thing in videos advertising GI in minecraft shaders, and tried it out in blender.

Currently the elbows are pointing in vaguely the right direction but they are somewhat off. I have checked that they have the right target bone selected. I have a feeling that this is due to some of the rotations of the bones in edit mode... Can someone help me with this?
I have a bone that's rotated 180 degrees on the y axis from where it's supposed to be. I wish I could simply press a button to unlock the axis, rotate the axis 180 degrees without physically rotating the bone and be done with it. Unfortunately, I'm trying to figure this out and the only results are people talking about going into edit mode, selecting all the vertices and then rotating them. That's great and all BUT I'M TRYING TO ROTATE A **BONE** not a mesh. Bones don't have vertices so this won't work. I really really really don't want to delete the bone, make a new one and re-weight it, so how tf do I do this? I used autodesk 3ds max in like 2007 and the button to do this was front and center and one of the few things I actually knew how to do.
 youtu.be
Been playing with more space stuff. Trying to cook up a TOS style Miranda class ship. I dont have the panelling where I want it but I'm pretty happy so far. Next step is animating some of the ship details like the bussard collectors and anti-colission strobes, etc.
 blog.guillaumematheron.fr
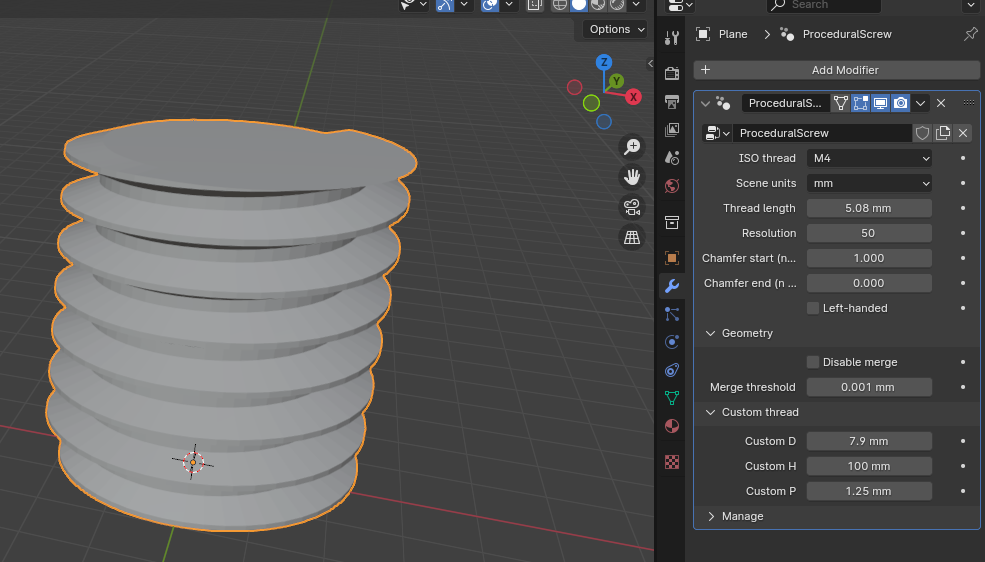
 I couldn’t find any good examples of threads generated with geometry nodes, so I made my own following the ISO metric screw thread specifications.
For instance, when setting render samples, noise threshold, or domain resolution I set it at 128, 256, etc. I've just done it this way ever since I learned Blender, but does this acutally do anything?

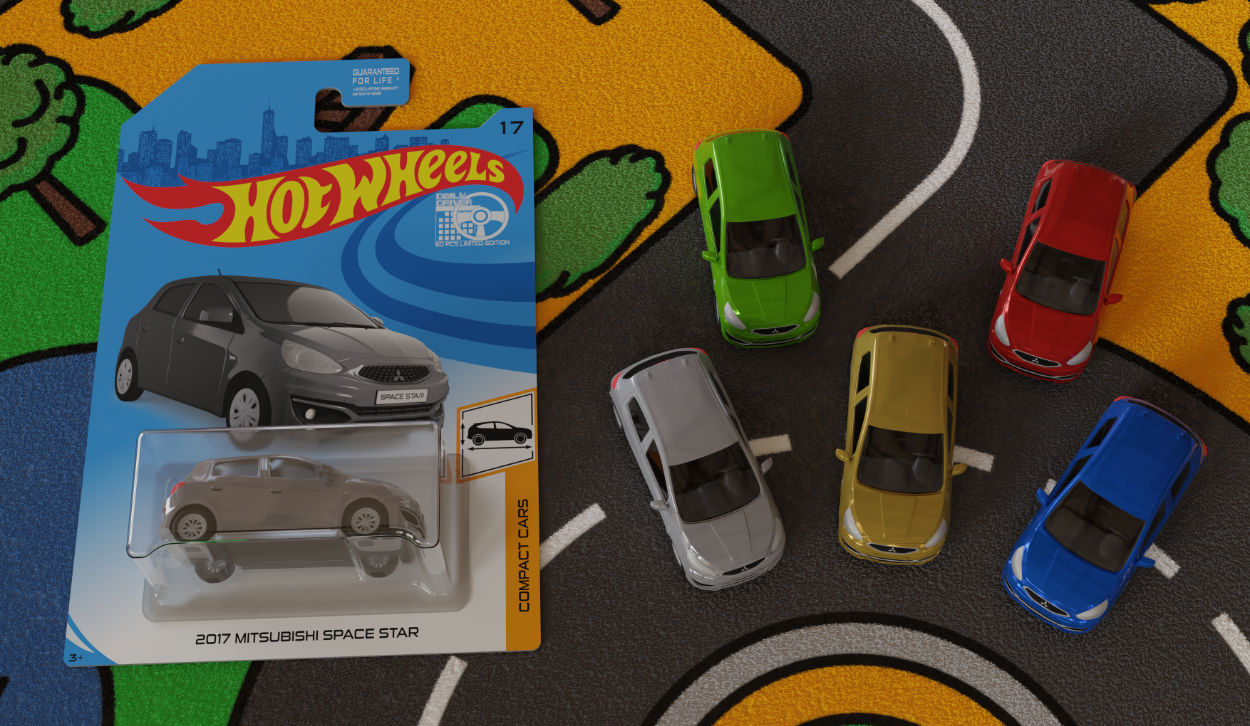 In addition to my [last post](https://sh.itjust.works/post/17781622) I want to share another work with you all. I created a toy car from my exsisting model and I also made a packing for it in the style of a Hotwheels toy car packing as if they would have made it. For the general shape of the cardboard I found a template on the internet. Apparently I wasn’t the first one that came up with the Idea of creating a toy car version of a casual vehicle. This template saved a lot of time in guessing the correct measurements and proportions. The rendering of the car on the packing was rendered with EVEE since it must not be too realistic. The cars depicted on these real packings are detailed, but look more like a colored illustration, also there are no enviromental reflections. The glass (windshield) is opaque. I added the „Space Star“ writing to the number plate, which usually would be on the trunk door. Without the number plate the picture of the car would be somewhat empy, although the depictions of cars from genuine Hotwheels packings don’t show number plates since these are mostly racing cars - or at least not boring everyday cars. With EVEE I was able to render the scene without any background because the rendering was put onto the cardboard design which I created in Affinity Designer entirely. For the bilster packing I used the subdivison surface modifier for smoothness and the solidify modifier to add a little bit of thickness. To make my car model appear like a toy car I had to apply some changes to it. The most noticeable one is the tires. I found out that toy cars only have a few basic tire designs which are shared between all kinds of cras. I made another set of tires with the help of the array modifier. Additionally to that I made the tires way wider than they would be in real life. The original car model has raher thin tires. Another thing I did was to remove all additional things like the decals, the windshield wipers the number plates and the antenna. Also I changed the material of many plastic parts (e.g. the mirrors) to the color of the paint. Usually the scale of these toy cars is 1:64. That means the length of the car is about 6 cm or 2.36 Inches. There are not many details visible. I changed the material properties as well. The head and taillights of reals toy models seem to be painted on, so I scaled down the transmission value and scaled up the roughness value for these materials.I changed the chrome material to a less reflective one as well. For the composition of the packing and the unpacked toy cars I choosed a road area rug. I guess many of you had one of these - at least I had one. For the fluffiness effect I used hair particles. Since it was not possible to find a good picture on the internet I was forced to re-draw the carpet using a blurry picture as a template. I did that in Affinity Designer. Then I used that drawing as an image texture. The carpet has 8 million hairs (at 10 million my laptop crashes) and working with that many particles was a pain in the ass. I saw the spinning beach ball a lot. Maybe that is the one of the reasons why desktop computers still have a place. For all renderings I used Cycles. I didn’t track time so I don’t know how long all of this took me. What I can say is that the drawing of the carpet took me about 9 hours, and the setup with the hair particles took almost all weekend. 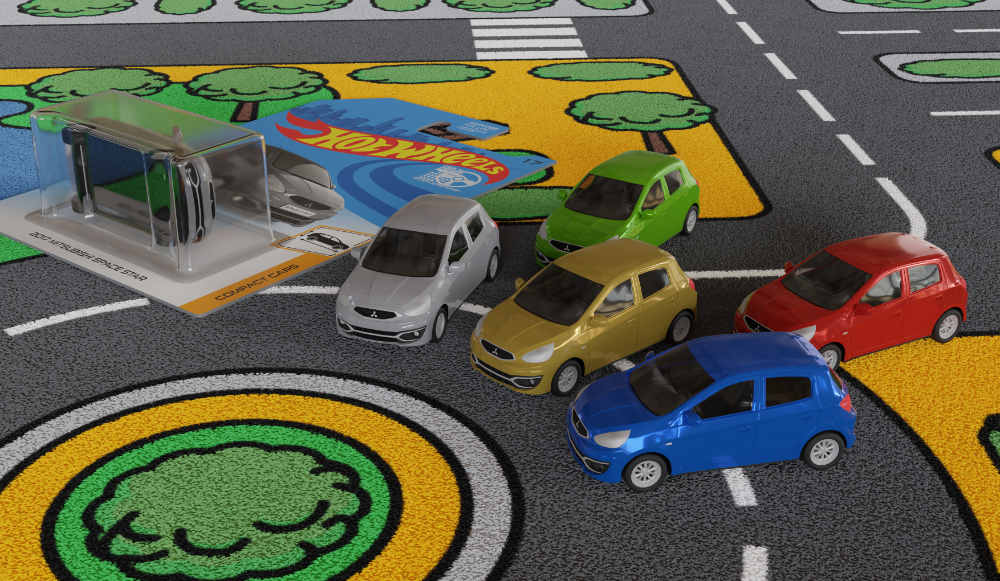
 www.youtube.com
> New 4k re-rendered version available! http://youtu.be/41hv2tW5Lc4"Tears of Steel" was realized with crowd-funding by users of the open source 3D creation too...

Continue working on kitchen furniture Just finished another object for [#projectharmonia](https://toot.garden/tags/projectharmonia) Verts: 710 Tris: 1128 [@blender](https://lemmy.world/c/blender) [\#3d](https://toot.garden/tags/3d) [#blender](https://toot.garden/tags/blender) [#blender3d](https://toot.garden/tags/blender3d) [#DigitalArt](https://toot.garden/tags/DigitalArt)
 peertube.wtf
> Enjoy the fourth episode of Blenderheads, a series about the people behind the Blender project. The editor and director –documentary maker Maaike Kleverlaan– works embedded in the Blender headquart...

This is my latest work - a Mitsubishi Space Star (also marketed as Mitsubishi Mirage) modelled in Version 3.6.9. It took me approximately 180 hours which spread over the course of 6 weeks (Blender, modelling only) as well as an additional 8 hours for tracing the side, front, back and top view (using Affinity Designer) which I used as reference images to create the general shape. All details were built with eye measure from photos. Most of the car is symmetrical, which means that only one half had to be built. I used the mirror modifier for almost everything as well as the subdivision modifier, shrinkwrap modifier (for the decals and the back lights) and array modifier (for the grille and for the heating lines in the back window, also for the wheel caps to an extent). As mentioned above it took some hours to complete the work. One reason might be that the work process is much slower than anticipated, due to lack of knowing all the tricks and features. My question to you is: Do you also spend so much time creating your work with Blender? The result (for the upload I removed the number plates):  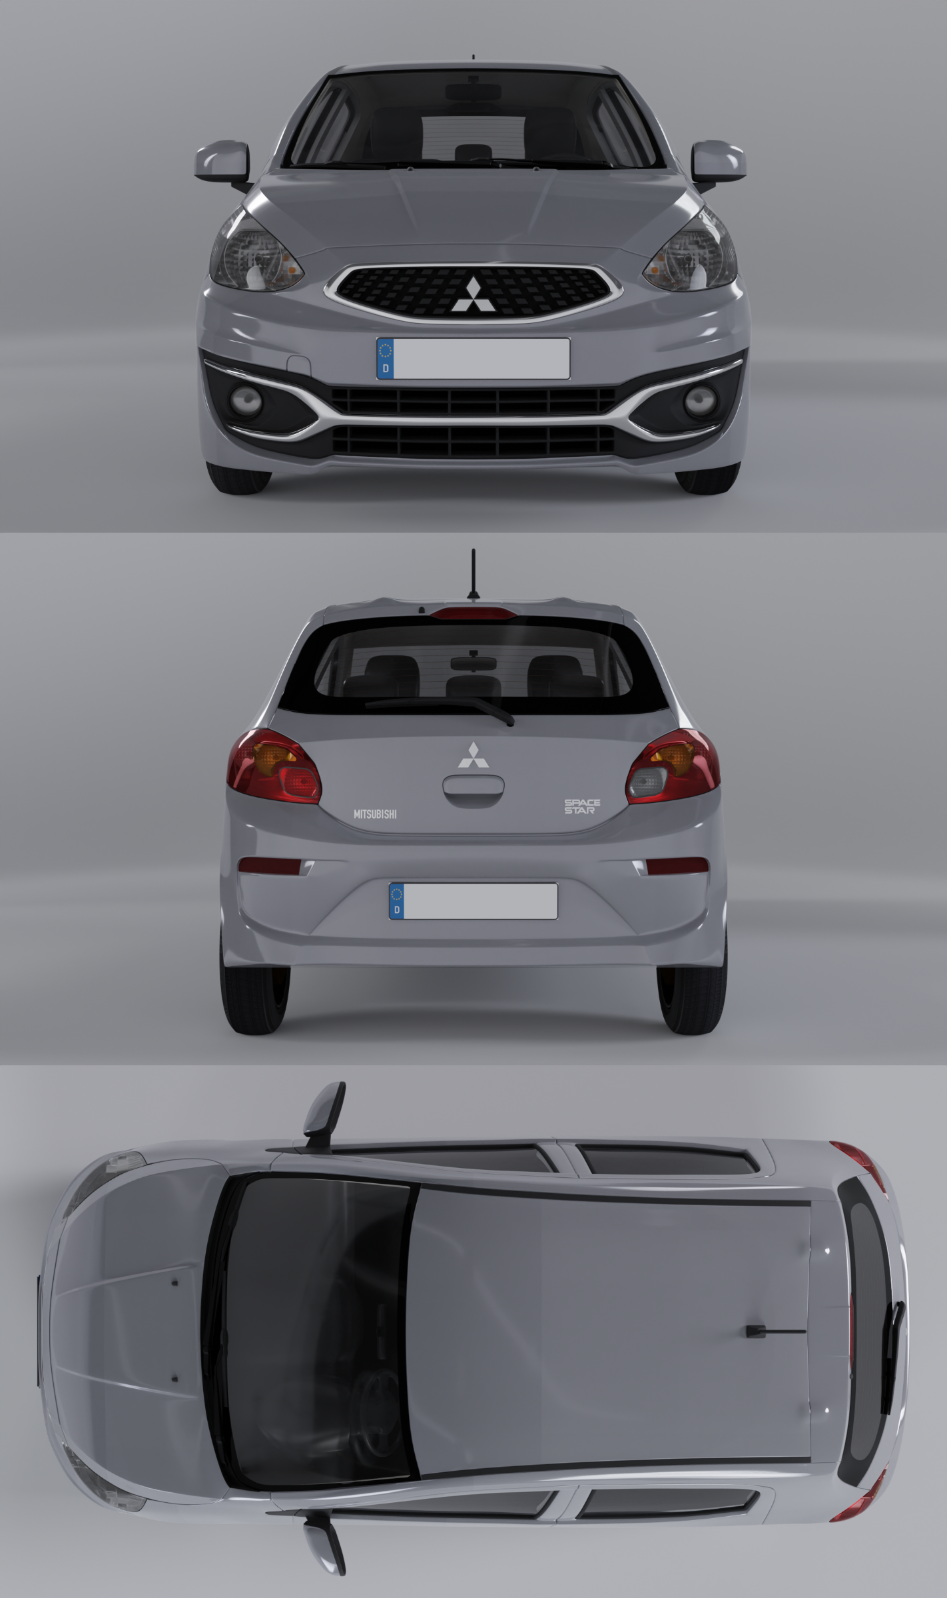 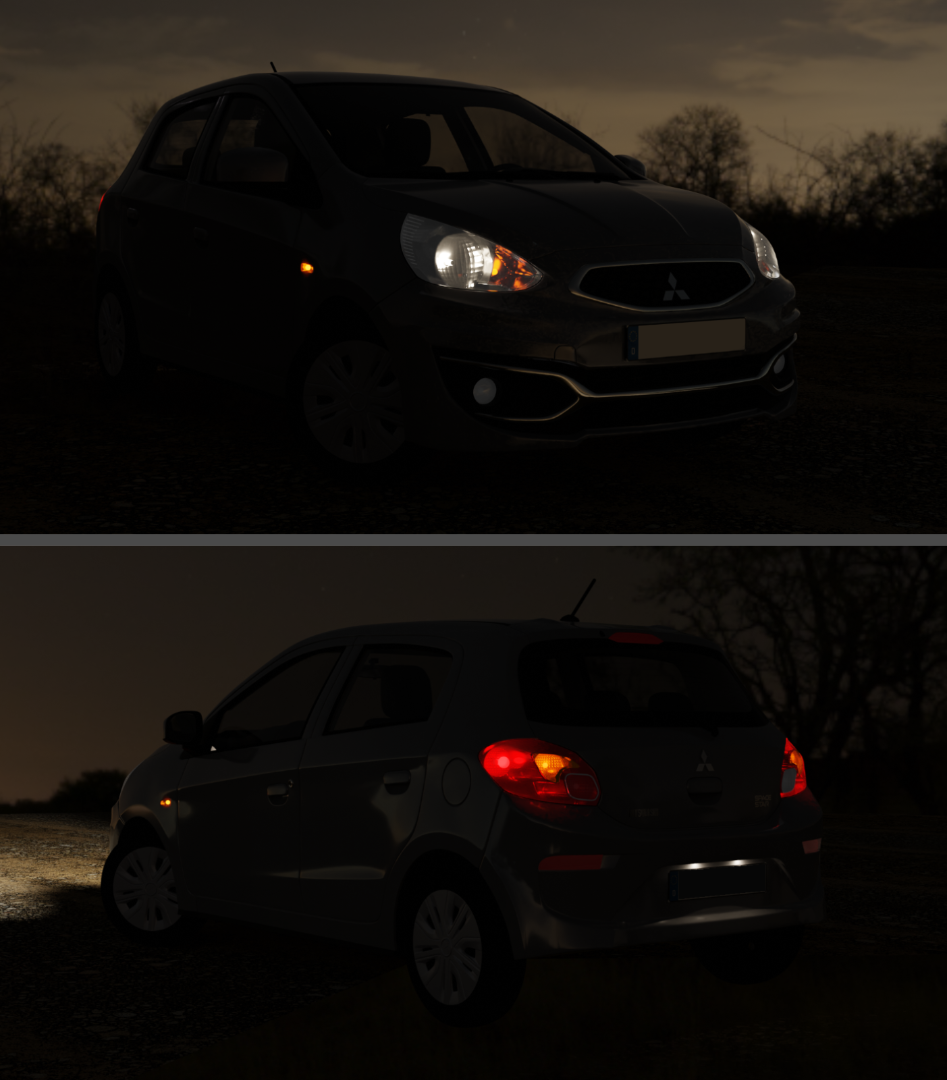 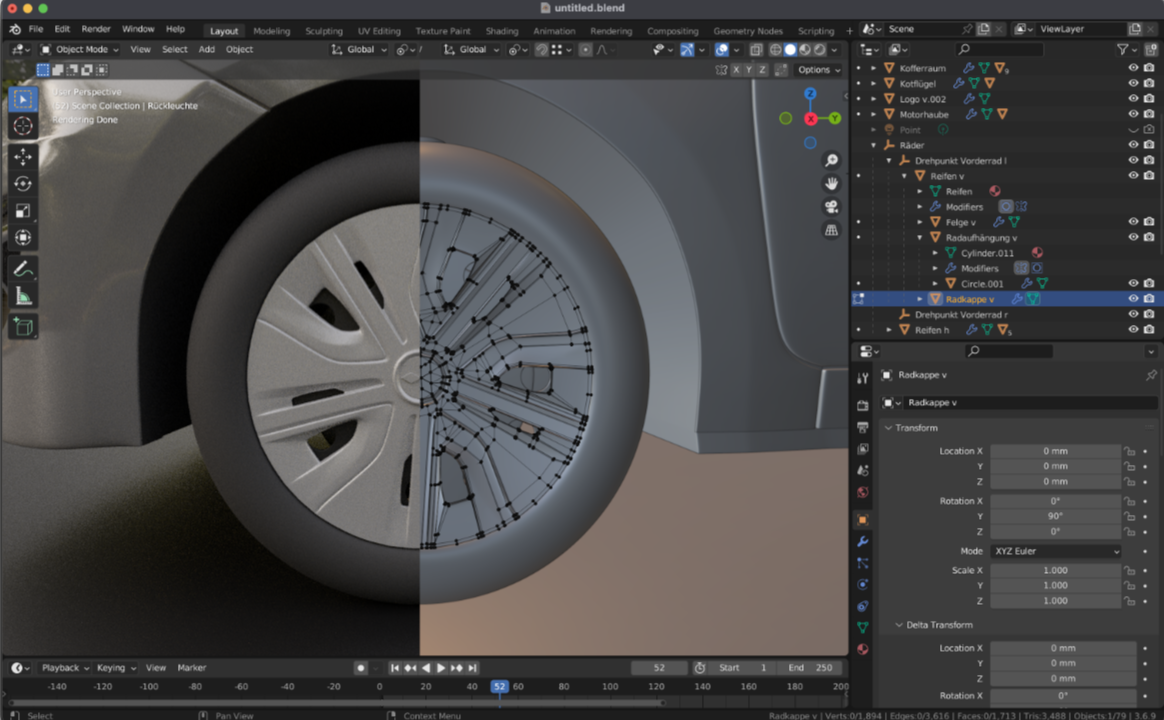

Finished my old project I started working on this project at the end of 2022. But got demoralized due to electricity blackouts and left 3D for a long time. Recently, my favorite 3D chat started a collaboration. I usually don't take part in such activities. But this time the condition was quite interesting: to finish one of the abandoned projects. I had 2 such projects and this one seemed the simplest. I'm glad I finished it. But in the process of doing it, I realized that if something stops, it's better to let it go. Old projects usually messy because you always improve as an artist and doesn't give you a lot of inspiration. [@blender](https://lemmy.world/c/blender) [\#blender](https://toot.garden/tags/blender) [#blender3d](https://toot.garden/tags/blender3d) [#3d](https://toot.garden/tags/3d) [#DigitalArt](https://toot.garden/tags/DigitalArt)

Just a simple little render i made a few weeks ago of an armory workshop thats based off a dnd campaign im in! This is my first render that took me more than one sitting to do, and i am pretty proud of how it turned out. Let me know what you think! Heres my pixelfed account if you want to see anything else i made! [@BoneALisa@pixelfed.social](https://pixelfed.social/BoneALisa) Edit: me not knowing how to link or spell lol

Vintage table Created the first furniture model for [#projectharmonia](https://toot.garden/tags/projectharmonia). Verts: 320 Tris: 542 [@blender](https://lemmy.world/c/blender) [\#3d](https://toot.garden/tags/3d) [#blender](https://toot.garden/tags/blender) [#blender3d](https://toot.garden/tags/blender3d)
 64.media.tumblr.com
This Vivian was originally designed by @fixated-draws-things on Tumblr, and I really wanted to turn it into a 3D sculpt! Character was sculpted in Nomad Sculpt, base and decor done in Blender, and final lighting and rendering done in Blender. Original design: https://www.tumblr.com/fixated-draws-things/736390130490884096/a-fun-lil-version-of-vivian-3 My post (includes a 3D turnaround): https://www.tumblr.com/cowboydudeart/746395900485763072/vivian-3d-sculpt-inspired-by-artwork-from-the

https://imgur.com/gallery/ekfHjPR (wirefram/clay/rotation). A sculpture made by a beekeeper in MoMa Sculpture Garden. Thought it looked cool and would be fun to make in Blender.
Hello everyone, I have a question about Blender properties. I'm reading BlenderDMX documentation and at page [BlenderDMX docs](https://blenderdmx.eu/docs/dmx/#blenderdmx-dmx-driver-for-blender) paragraph "BlenderDMX DMX driver for Blender" it says that I can use DMX signals to control any Blender property. I also have modelled some lasers and would love to control some of the nodes' properties (Emission Color mostly) with DMX for a simulation. Does anyone know if that's possible and how to do it? A search for "blender properties" and "blender property keywords" gave me nothing.

All made in Blender 😊


Render on the left, real product photos on the right. (clay render and wireframe in comments)

For those who make greater than 32 mistakes in a row but less than 256
 www.blendernation.com
> The long awaited/brewing official Blender Extensions Platform's public alpha version has silently gone online a few days back and can be accessed at http://extensions.blender.org/ !

So I'm very new to blender. Found some great tutorials and managed to get my first low poly sketch to a point I am pretty proud of in a couple days. (Pictured!) Unfortunately the video guides for rigging/animating are going way too fast or not in depth enough. If anyone has a good video or guide saved I would appreciate some direction!

I've been working on this scene off an on for about 4 years now. Its become a sort of log of my progress learning blender. From subsurface modelling to node texture creation, volumetric effects, etc. Its far from done. It's missing some props (the falcon, some desk stuff) and a real narrative focus. Not to mention the janky scenery outside. Its a work in progress. Its not exactly the stuff that dreams are made of yet but I wanted to share as its getting close to a level I'm proud of. So long!